Terraform
Terraform
Setup tf state storage
Following this manual and this manual
Following is used a new subscription (git bash on windows with azure cli installed):
$ az login
$ az account set --subscription '{subscription-id}'
$ RESOURCE_GROUP_NAME='{rg-name}'
$ STORAGE_ACCOUNT_NAME='{storage-account-name}'
$ CONTAINER_NAME='{container-name}'
$ az group create --name $RESOURCE_GROUP_NAME --location northeurope
$ az storage account create --resource-group $RESOURCE_GROUP_NAME --name $STORAGE_ACCOUNT_NAME --sku Standard_LRS --encryption-services blob --allow-blob-public-access false --location northeurope --https-only true
$ az storage container create --name $CONTAINER_NAME --account-name $STORAGE_ACCOUNT_NAME

cd ./terraform/environments/uat
tf init
tf plan
tf apply
init tfstate
Terraform has 4 main commands;
terraform initthis will initialize terraform, retrieve the state file, download the providers, etc.terraform planthis will compare your state with the infrastructure and show you which changes will be done IF the plan is appliedterraform applythis will apply the changes to your infrastructureterraform destroythis will destroy your infrastructure completely
local setup
Using tf with your personal
just run az login before you do terraform stuff. Also check here
Using tf with a service principal
Access / Role assignments A service principal needs to be generated using AZ CLI. Azure provider. Example:
az ad sp create-for-rbac –role=”Contributor” –scopes=”/subscriptions/{subscription-id}” -n “Terraform-Service-Principal” –years 2 (Make sure that you have the necessary rights to do this)
The output of this command looks like this:
{ “appId”: “{appId}”, “displayName”: “Terraform-Service-Principal”, “password”: “***”, “tenant”: “{tenantId}” } These values need to be stored safely. Once the service principal has been created, there are some extra role assignments needed Storage blob data contributor Storage blob data owner (modify/create stuff)
Locally the credentials can be stores in ~/.bashrc;
export ARM_CLIENT_ID="{appId}"
export ARM_CLIENT_SECRET="***"
export ARM_TENANT_ID="tenantId"
export ARM_SUBSCRIPTION_ID="{subscriptionId}"
add tf alias to ~/.bashrc
cd ~vim .bashrc- press
"o" to append a newline - write
alias tf="terraform.exe" - press
escand write:wqand pressenter
run terraform
cd into your folder with terraform script eg.: /environments/dev
Normally a terraform folder is structured like:
- terraform
- module
- environments
- dev
- module.tf
- output.tf
- provider.tf
- sit
- prod
- dev
run tf init
Export azure resources
There is an Azure Export tool for terraform. Microsoft learn
The main.tf holds the new terraform scripts to create the exported resources. Don’t forget to import these
resources to terraform before apply these scripts.
Import existing resources
- Check for a clean terraform plan
- Add a minimal resource block
- Import the resource (You can use the terraform id from the plan output)
- Configure until terraform plan is clean again
- Apply the config with the –refresh-only switch source
It works like this:
tf import {your-terraform-id} {object-id-on-azure}
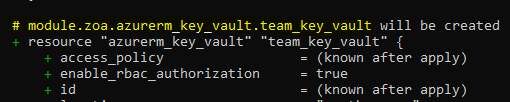
Where {your-terraform-id} is the string after the # printed out when you do tf plan
Where {object-id-on-azure} is the “Resource ID”. You can find it on the resource on Azure portal under Properties:
Its a path, something like “/subscriptions/{subscriptionid}/resourceGroups/{rg-name}/providers/Microsoft.KeyVault/vaults/{keyVaultName}”
concatenate
You can also concatenate variables with strings like in this example:
resource "azurerm_key_vault_secret" "service_principal_name" {
  name         = "${var.environment}-service-principal-name}"
  value        = var.sp_display_name
  key_vault_id = azurerm_key_vault.team_key_vault.id
}